
Ph@ntom Maxx chassis
Page 1 of 1

Ph@ntom Maxx chassis
![]() by onclebens Thu 7 Aug - 23:59
by onclebens Thu 7 Aug - 23:59
OUT OF STOCK
V2 Price is 325$
***********************************************************************************************************************
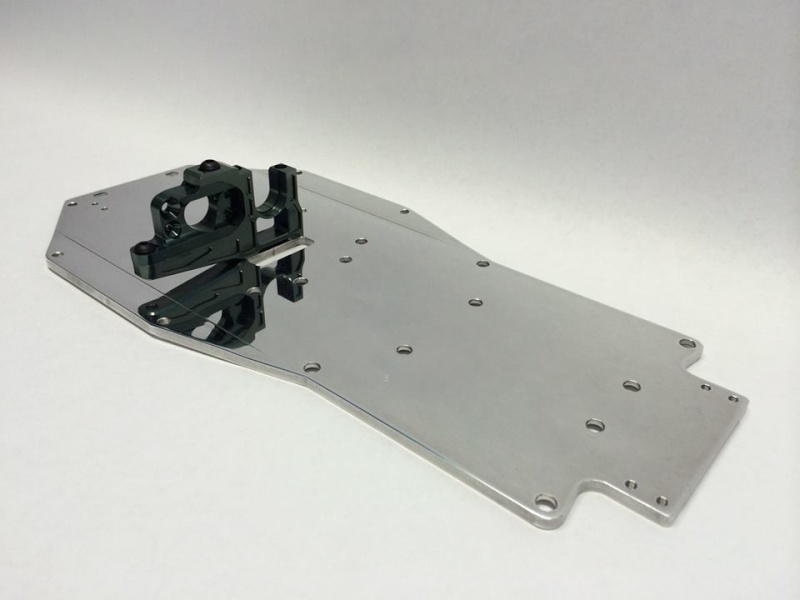
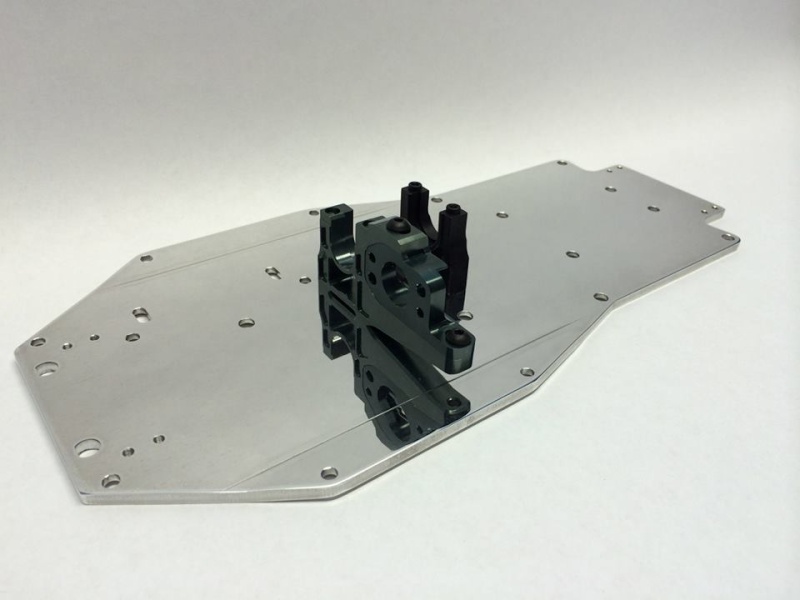
Chassis plate after milling job and before anodization and bending job :
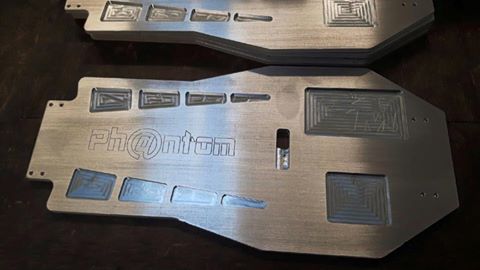
15% lighter than V1 and hard anodization.
Provided in the kit :
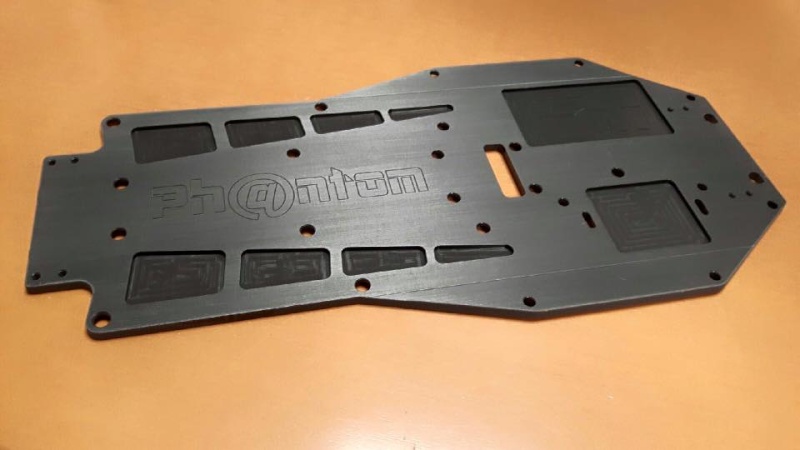
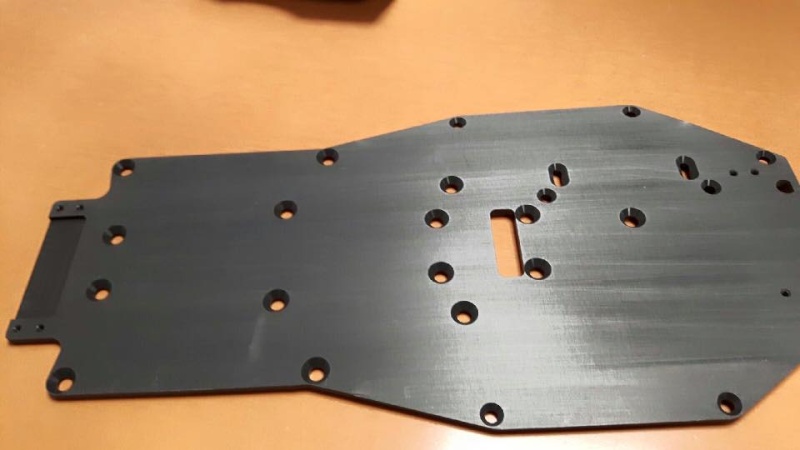
4mm thick 7075 milled chassis plate + 30µm hard anodizing.
lightweight milled 7075 front brace.
7075 front upper plate.
7075 rear upper mount to the bulk.
rear stainless steel dogbone (standard or extended).
Upper belcrank for servo saver + E-clip, (must use CentralemaxxRc SS or UE SS)
Parts needed (NOT PROVIDED)

**************************************************************************************
assembly steps :
http://www.tinuss.com/ph@ntom/
Joe's build
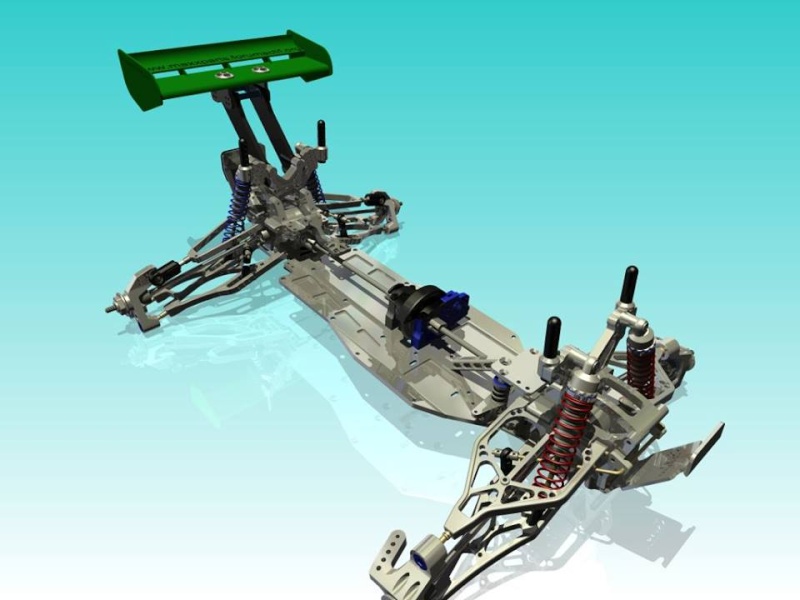
After a few months in development Centralemaxx RC and its head engineer Onclebens has come out with a new racing chassis specifically designed to fit the Front and Rear ends of our beloved Maxx trucks. This is designed around the "EMaxx" and will be a electric competition truck to take on your local Truggy class at your track. I am happy to introduce my racing Ph@ntom!
I have been chosen as a test pilot for this new truck. I will be building one with all the goodies of a full blown Maxx Racer! This will be using a host of quality parts from Centralemaxx RC, Unlimited Engineering, Pro Line, Great Assembly, Tekin, Serpent, Mugen, STRC, AE to name a few. LiPo's have not been ordered yet as I want to try something new so I have been searching for a great newer pack to try out.
This is the brain child after years of enjoying the Maxx platform but always striving for more performance. Centralemaxx RC figured it was time to build their own platform! With superior knowledge in CAD development Onclebens and kikimax was able to design a superior racing chassis. We are confident it is going to win races!!
I present to you the "Ph@ntom"!


I will have a body for show and tell and one for the track, same thing with wheel and tire set ups. I will be trying some different configurations at different tracks. This will be sent off for Anodizing tomorrow. So I will be updating the thread as progress continues on the build. We are going with a super cool theme for this truck! Pictures coming when it returns home!
Parts are used from existing kits on the market so the build is constructed with everything on the market today. I am using Unlimited Engineering parts which are not available at this time but you can use any Front and Rear Maxx bulkhead set up for a truly competitive platform. All parts made by Centralemaxx RC are machined from 7075 aluminum for great strength!
Parts that come with the chassis kit and needed parts are on the list below :


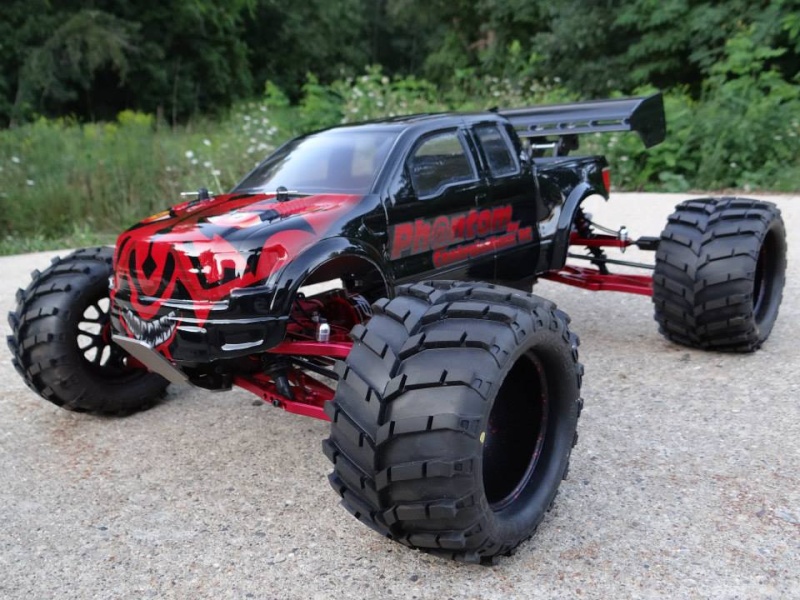
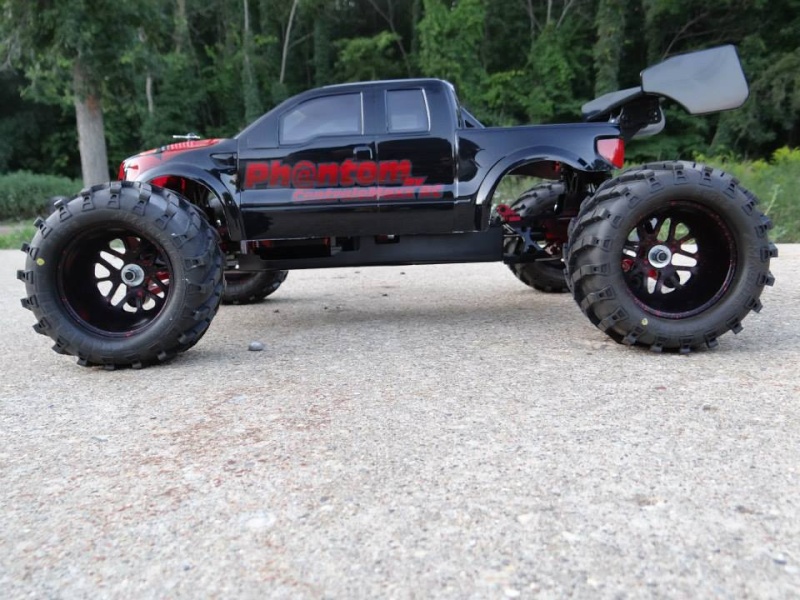
Here is Gregory's completed testing truck :

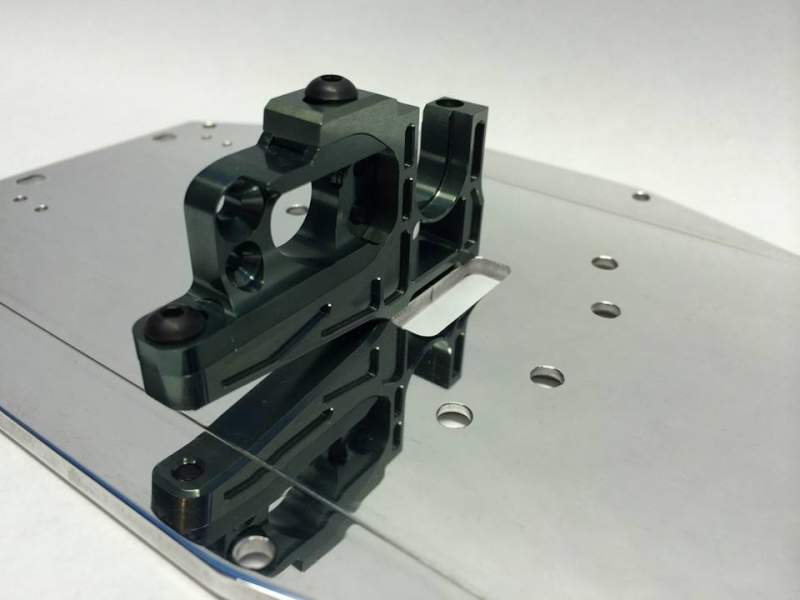
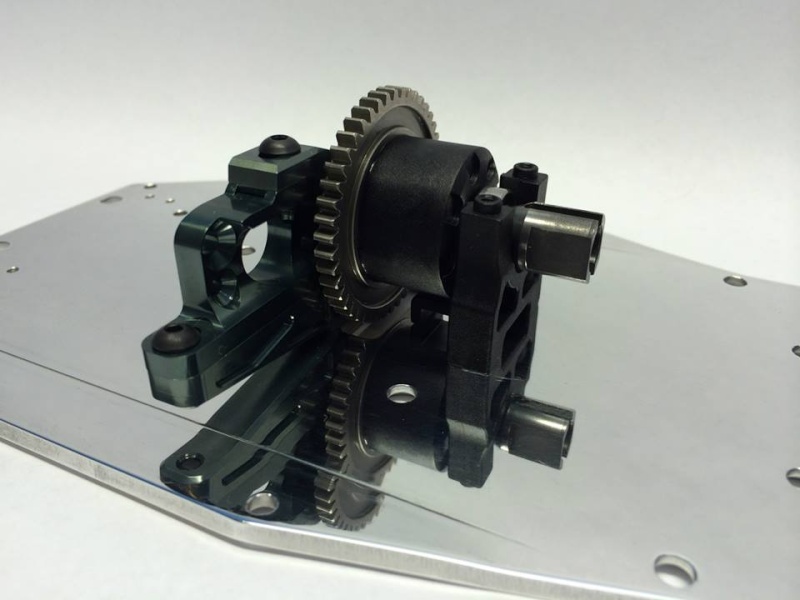
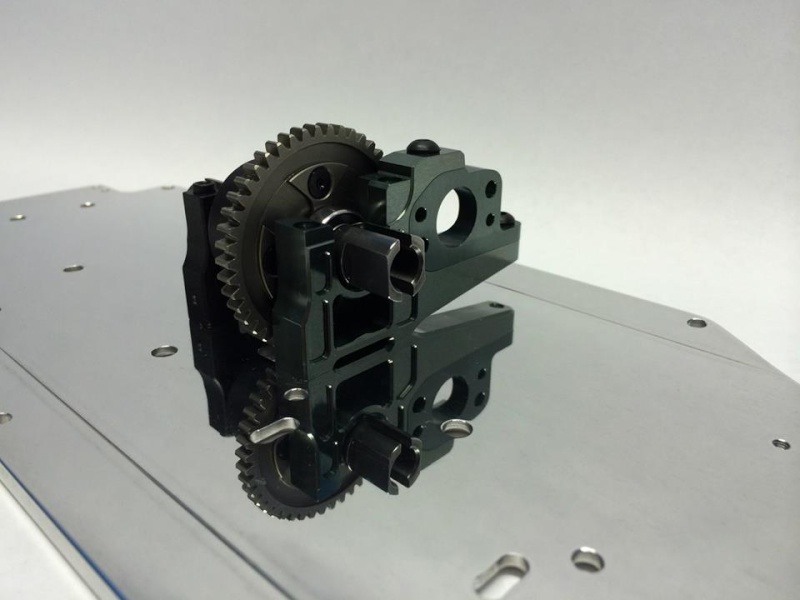
Here are some close up shots of the parts :


Custom GEN IV piece for correct steering geometry to the servo placement.

Keep following this thread for updates on one of the most exciting upgrade kits for our beloved Maxx platform! I am very excited and honored to be chosen as a tester for this new race chassis.
For more information head on over to the Centralemaxx RC Facebook page and get in on the conversation or post up here! This is one of my most exciting builds to date!
Or you can check out some testing videos from Centralemaxx RC on YouTube!
https://www.youtube.com/watch?v=w3ry72ejkrE
https://www.youtube.com/watch?v=Lyzbh7BGHsM
https://youtu.be/bwXeUmTjnOg


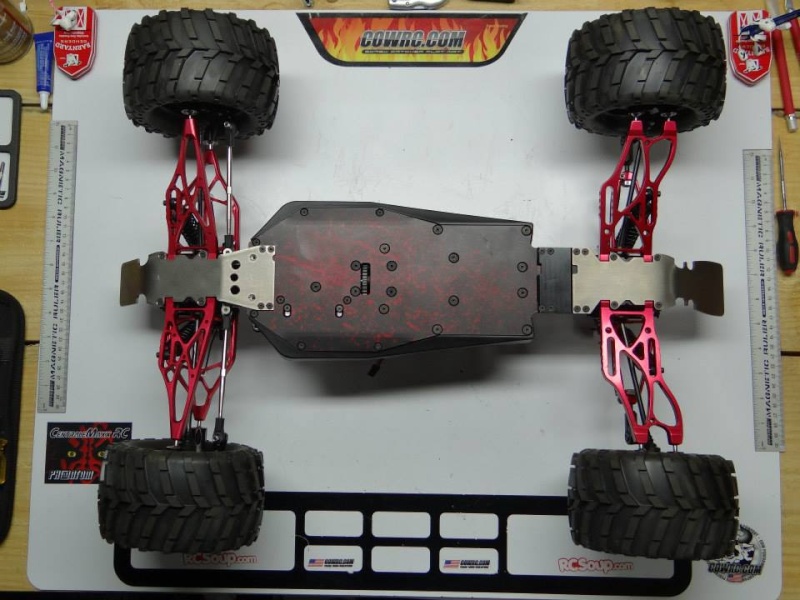
Center section of the Ph@ntom.


F/R braces attached.

Rear end installed.

Front end installed.

Done for the night. Suspension next!

Thanks for stopping by and checking out my rig! Gregory and I appreciate it!!
V2 Price is 325$
***********************************************************************************************************************
Chassis plate after milling job and before anodization and bending job :
15% lighter than V1 and hard anodization.
Provided in the kit :
4mm thick 7075 milled chassis plate + 30µm hard anodizing.
lightweight milled 7075 front brace.
7075 front upper plate.
7075 rear upper mount to the bulk.
rear stainless steel dogbone (standard or extended).
Upper belcrank for servo saver + E-clip, (must use CentralemaxxRc SS or UE SS)
Parts needed (NOT PROVIDED)
**************************************************************************************
assembly steps :
http://www.tinuss.com/ph@ntom/
Joe's build
After a few months in development Centralemaxx RC and its head engineer Onclebens has come out with a new racing chassis specifically designed to fit the Front and Rear ends of our beloved Maxx trucks. This is designed around the "EMaxx" and will be a electric competition truck to take on your local Truggy class at your track. I am happy to introduce my racing Ph@ntom!
I have been chosen as a test pilot for this new truck. I will be building one with all the goodies of a full blown Maxx Racer! This will be using a host of quality parts from Centralemaxx RC, Unlimited Engineering, Pro Line, Great Assembly, Tekin, Serpent, Mugen, STRC, AE to name a few. LiPo's have not been ordered yet as I want to try something new so I have been searching for a great newer pack to try out.
This is the brain child after years of enjoying the Maxx platform but always striving for more performance. Centralemaxx RC figured it was time to build their own platform! With superior knowledge in CAD development Onclebens and kikimax was able to design a superior racing chassis. We are confident it is going to win races!!
I present to you the "Ph@ntom"!
I will have a body for show and tell and one for the track, same thing with wheel and tire set ups. I will be trying some different configurations at different tracks. This will be sent off for Anodizing tomorrow. So I will be updating the thread as progress continues on the build. We are going with a super cool theme for this truck! Pictures coming when it returns home!
Parts are used from existing kits on the market so the build is constructed with everything on the market today. I am using Unlimited Engineering parts which are not available at this time but you can use any Front and Rear Maxx bulkhead set up for a truly competitive platform. All parts made by Centralemaxx RC are machined from 7075 aluminum for great strength!
Parts that come with the chassis kit and needed parts are on the list below :
Here is Gregory's completed testing truck :
Here are some close up shots of the parts :
Custom GEN IV piece for correct steering geometry to the servo placement.
Keep following this thread for updates on one of the most exciting upgrade kits for our beloved Maxx platform! I am very excited and honored to be chosen as a tester for this new race chassis.
For more information head on over to the Centralemaxx RC Facebook page and get in on the conversation or post up here! This is one of my most exciting builds to date!
Or you can check out some testing videos from Centralemaxx RC on YouTube!
https://www.youtube.com/watch?v=w3ry72ejkrE
https://www.youtube.com/watch?v=Lyzbh7BGHsM
https://youtu.be/bwXeUmTjnOg
Center section of the Ph@ntom.
F/R braces attached.
Rear end installed.
Front end installed.
Done for the night. Suspension next!
Thanks for stopping by and checking out my rig! Gregory and I appreciate it!!
Last edited by onclebens on Sun 19 Mar - 20:58; edited 10 times in total

onclebens- Admin
- Messages : 49
Date d'inscription : 2014-08-05
Localisation : FRANCE -


onclebens- Admin
- Messages : 49
Date d'inscription : 2014-08-05
Localisation : FRANCE -


onclebens- Admin
- Messages : 49
Date d'inscription : 2014-08-05
Localisation : FRANCE -
Re: Ph@ntom Maxx chassis
![]() by onclebens Mon 8 Sep - 21:37
by onclebens Mon 8 Sep - 21:37
Gabri Brito "Mirror" #7 [email=Ph@ntom]Ph@ntom[/email]


onclebens- Admin
- Messages : 49
Date d'inscription : 2014-08-05
Localisation : FRANCE -
Re: Ph@ntom Maxx chassis
![]() by onclebens Thu 7 Jan - 9:44
by onclebens Thu 7 Jan - 9:44
Hey guys,
Got some time to wrench over the holidays, spent some time on the Ph@ntom. Still waiting for parts to arrive from the states, but thought I would throw the VBS from my G4 build on there so it can take some shape while I wait.
Hope you guys like it. I thought I would doco the steps of the build for other Ph@ntom owners should they need any help building theirs:
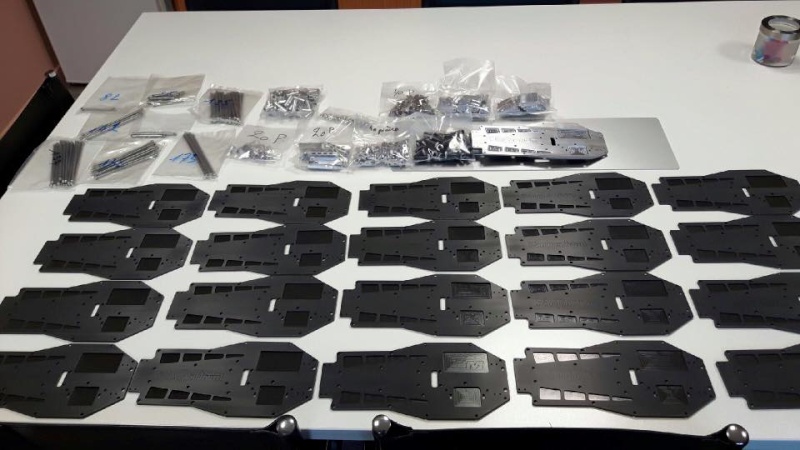
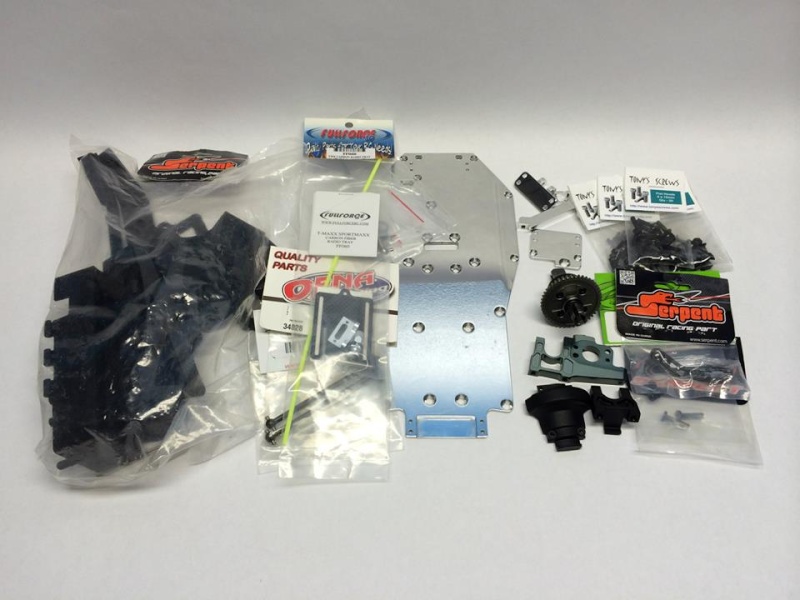
This is how my afternoon began, nice bunch of parts:

Spent some time prior giving various parts a quick polish:

1.) 2 x M4x15mm flat head screws to attach the MBX7 Diff Mount to chassis plate.


2.) 2 x M4x10mm flat head screws to attach rear diff mount to chassis

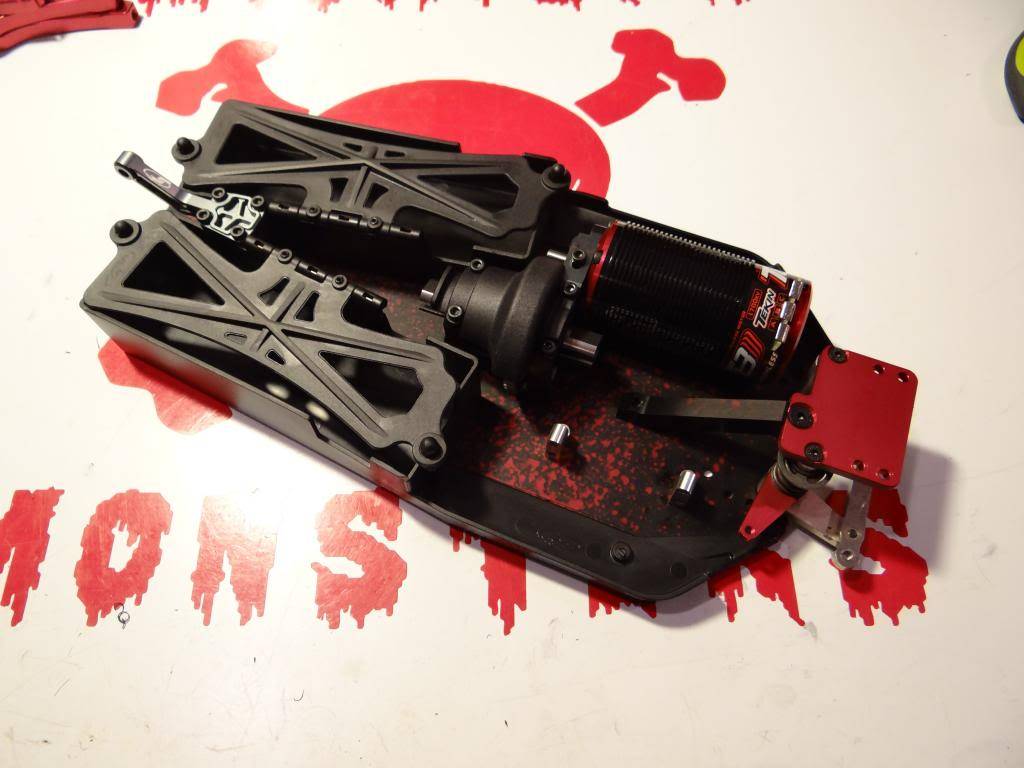
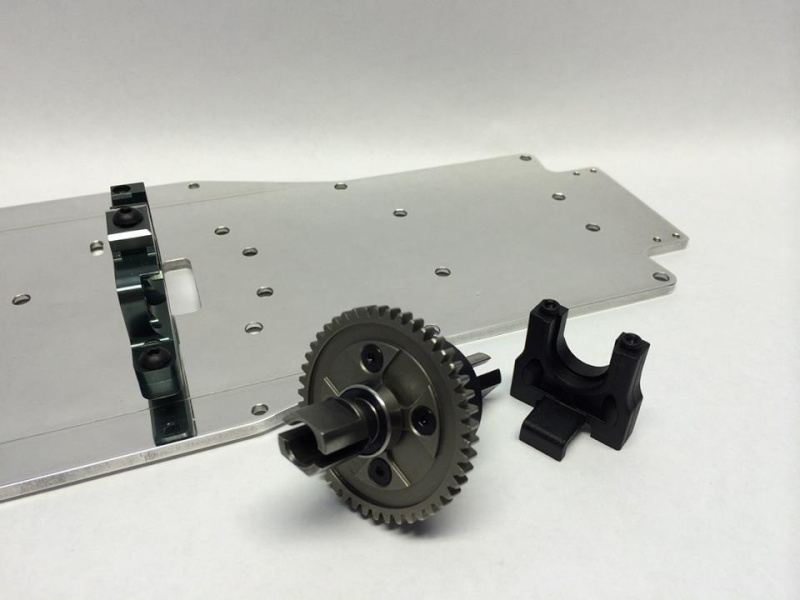
3.) Fit MBX7 centre diff or similar

4.) Attach diff top cover with 4 x M3x8mm cap head screws


5.) Attach servo saver posts to chassis (2 x M3x8mm Flat Head Screws will be used once front skid is installed later


6.) Install Custom Centralemaxx Ph@ntom Servo Saver Arm to ensure correct geometry with servo. (I am using the Centralemaxx Servo Saver for this build, but other Servo Savers will also work.)

7.) Picture shows servo saver installed on the chassis.


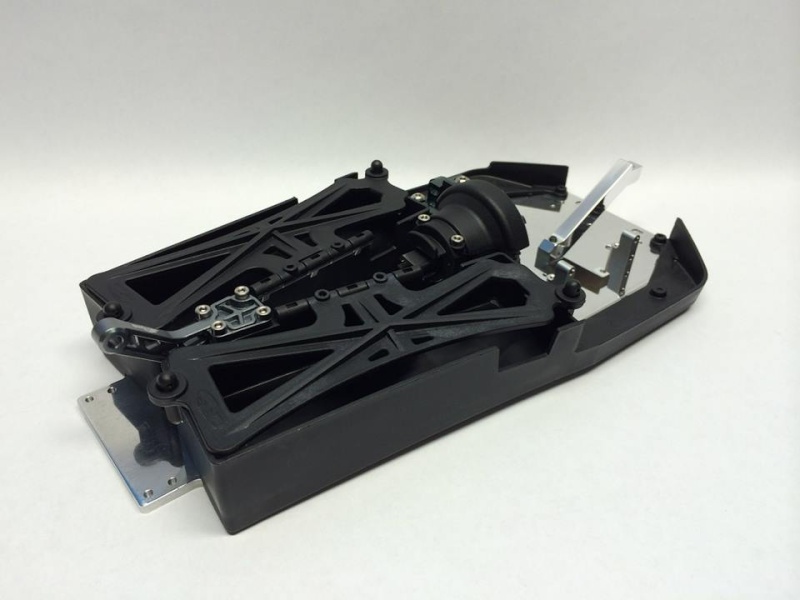
8.) Install Serpent Battery Cases onto the chassis using 6 x M3x10mm screws & 10 x M4x10 screws

9.) You will need to trim a desired mount off the front of the right Battery Case for the Servo Saver Arm to function correctly.


10.) Install the Serpent Battery Case Top Straps


11.) I will be running a Centralemaxx Chassis Extension, installed with 4 x M3x10mm Flat Head Screws


12.) Install the Serpent Chassis Brace & Serpent Bolt Transmission Brace with 5 x M3x8mm Cap Head Screw


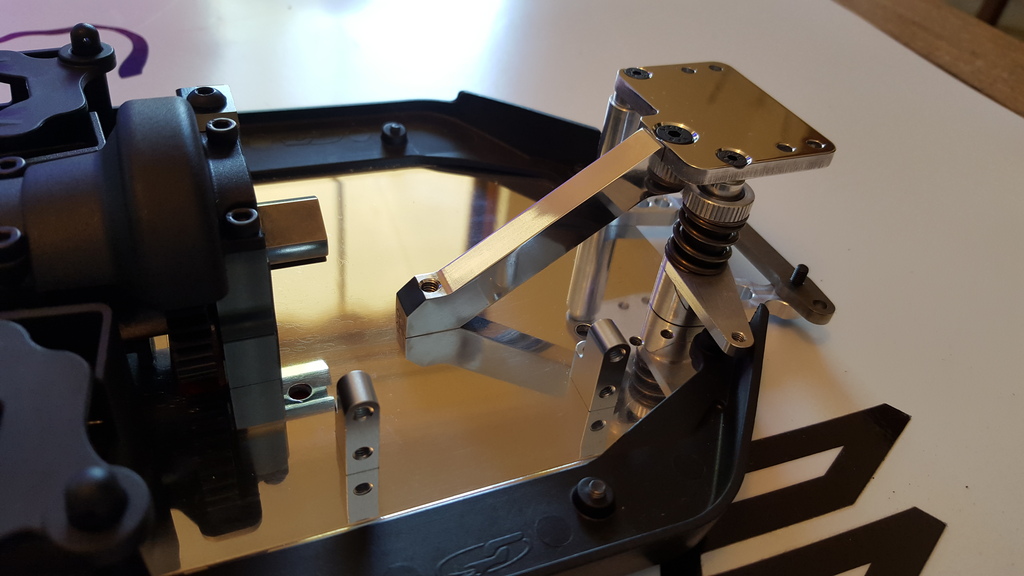
13.) Install the front Centralemaxx Chassis Brace & Servo Mounts using 2 x M3x8mm Flat Head Screws & 1 x M4x10mm Flat Head Screw


14.) Install front chassis brace top plate using 1 x M4x10mm & 2 x M3x8mm Flat Head Screws
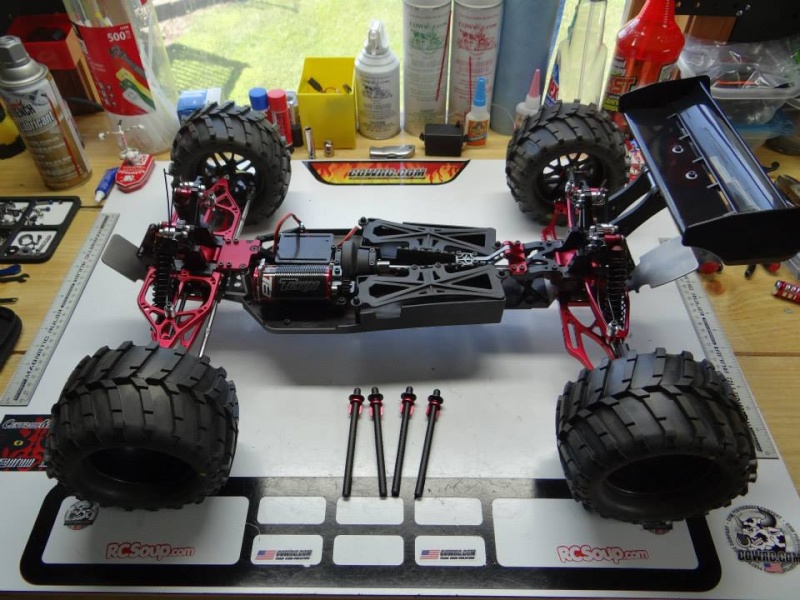
Starting to take shape and looking good:


15.) Install the Carbon Fibre FullForce RC Receiver Box Tray


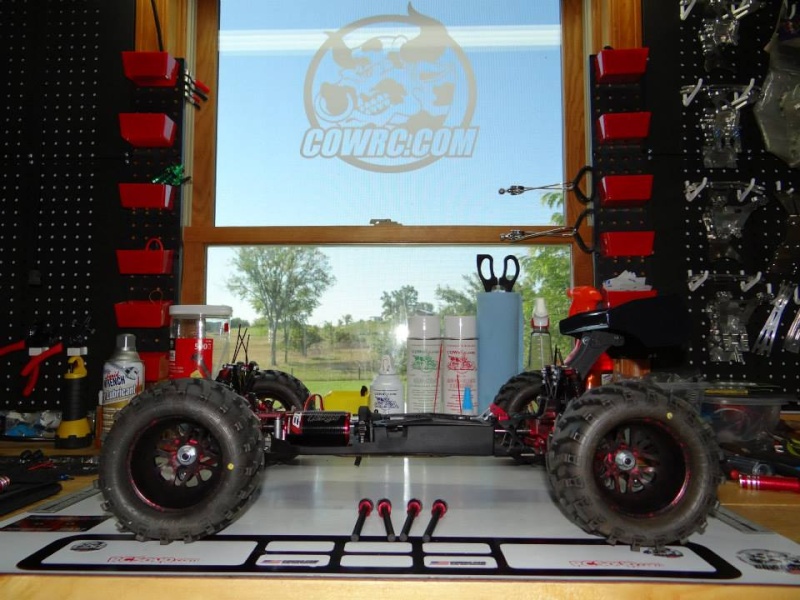
Finally with the addition of the Unlimited Engineering VBS & Widetrac, we have a 95% complete truck:


Got some time to wrench over the holidays, spent some time on the Ph@ntom. Still waiting for parts to arrive from the states, but thought I would throw the VBS from my G4 build on there so it can take some shape while I wait.
Hope you guys like it. I thought I would doco the steps of the build for other Ph@ntom owners should they need any help building theirs:
This is how my afternoon began, nice bunch of parts:

Spent some time prior giving various parts a quick polish:

1.) 2 x M4x15mm flat head screws to attach the MBX7 Diff Mount to chassis plate.


2.) 2 x M4x10mm flat head screws to attach rear diff mount to chassis

3.) Fit MBX7 centre diff or similar

4.) Attach diff top cover with 4 x M3x8mm cap head screws


5.) Attach servo saver posts to chassis (2 x M3x8mm Flat Head Screws will be used once front skid is installed later


6.) Install Custom Centralemaxx Ph@ntom Servo Saver Arm to ensure correct geometry with servo. (I am using the Centralemaxx Servo Saver for this build, but other Servo Savers will also work.)

7.) Picture shows servo saver installed on the chassis.


8.) Install Serpent Battery Cases onto the chassis using 6 x M3x10mm screws & 10 x M4x10 screws

9.) You will need to trim a desired mount off the front of the right Battery Case for the Servo Saver Arm to function correctly.


10.) Install the Serpent Battery Case Top Straps


11.) I will be running a Centralemaxx Chassis Extension, installed with 4 x M3x10mm Flat Head Screws


12.) Install the Serpent Chassis Brace & Serpent Bolt Transmission Brace with 5 x M3x8mm Cap Head Screw


13.) Install the front Centralemaxx Chassis Brace & Servo Mounts using 2 x M3x8mm Flat Head Screws & 1 x M4x10mm Flat Head Screw


14.) Install front chassis brace top plate using 1 x M4x10mm & 2 x M3x8mm Flat Head Screws

Starting to take shape and looking good:


15.) Install the Carbon Fibre FullForce RC Receiver Box Tray


Finally with the addition of the Unlimited Engineering VBS & Widetrac, we have a 95% complete truck:


onclebens- Admin
- Messages : 49
Date d'inscription : 2014-08-05
Localisation : FRANCE -
» Ghöst Nitro LCG Chassis
» E-Ghöst Chassis
» Magneto Chassis Kit
» Magneto Chassis Kit
» CentralemaxxRC Chassis extension
» E-Ghöst Chassis
» Magneto Chassis Kit
» Magneto Chassis Kit
» CentralemaxxRC Chassis extension
Page 1 of 1
Permissions in this forum:
You cannot reply to topics in this forum|
|
|